Common Issues

iPhone 4

Apple’s iPhone 4 was first released in June of 2010. At the time, the iPhone 4 was the world’s thinnest iPhone. The smartphone possessed a stainless steel frame and strengthened aluminosilicate glass. At the time of its release, the iPhone 4 boasted a lengthy list of “first ever” features such as the first ever front facing camera, the first smartphone with Retina Display, and the first smartphone to be released for CDMA networks. In 2011, Apple released the iPhone 4S, the iPhone 4’s successor.  If your iPhone 4 is suffering from a cracked screen, malfunctioning battery or broken home button, check out the guides below by CPR Cell Phone Repair to resolve some of the most common iPhone 4 issues.
device image

iPhone 4 Battery Replacement – When and Why You May Need it

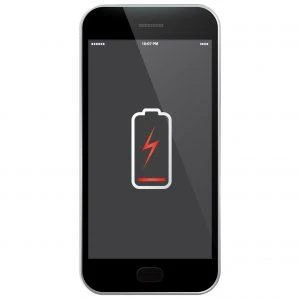
If you’ve had trouble with your iPhone 4 battery, you’re not alone. Instead of lasting the advertised 14 hours of talk time, disappointed users have reported it lasting only a few hours in some extreme cases. It’s a giant frustration for a phone that offers so much excitement through other features like a vibrant 3.5” backlit LCD touchscreen, a 5MP camera with LED flash, and at least 8GB of internal memory.

So many users are seeking answers about iPhone 4 battery replacement due to this confusing shortage. Could something else besides a bad battery be causing the drain? Who should you seek iPhone 4 battery repair from if you need it?

Why is your iPhone 4 battery draining so quickly?

According to acclaimed tech expert David Payette, “The vast majority of iPhone battery issues are software related.” Some of those software battery drains include:

  • Push Mail – When push mail is enabled, your phone maintains a constant connection to the email server so that you get notified automatically of new mail and messages. The connection requires a data flow that uses a massive amount of battery.
  • Tracking – Location, location, location! Apps and built-in services on your iPhone 4 constantly track your location. For some, this is a privacy concern because others can track where you are physically, including advertising agencies. It’s also a significant battery drain.
  • App Activity – It’s easy to get caught up in the action of the many apps available at your fingertips on the iPhone 4, and sometimes we forget to shut them down. The more apps that are active at any given time or that crash in the background, the more battery your phone wastes.

Other experts, even Apple technicians on the online web forums, claim battery drain for iPhone 4 occurs due to a corrupt contact sync process or poor battery seating. Both accounts and the battery itself can be removed and reinstalled in an attempt to fix. While you can remove and reinstall the accounts on your own, the battery itself may require professional attention.

Furthermore, expert Sharon Profis of CNET asserts that “it’s not the standout features like AirDrop or the Notification Center — it’s the stealthy settings buried beneath a stack of menus” that truly hurt your precious battery life. So when it comes to figuring out which hidden features are the cause, seeking help from an experienced technician is sometimes the most efficient method.

How to extend iPhone 4 Battery life?

It’s possible to extend your battery life by altering phone settings and counteracting a few common issues that drain iPhone 4 battery life (like those listed above). Here are a few tips you might consider:

  • Disable Push Mail – Navigate to Settings -> Mail, Contacts, Calendars -> Fetch New Data and turn “Push” off. Then switch each individual account to “Fetch” and assign a longer interval (such as 30 minutes) to this feature.
  • Disable Location Tracking – Some people may like the location tracking feature for some apps, in which case you shouldn’t turn off this ability completely. Instead, turn off the record you phone keeps of locations by going to Settings -> Privacy -> Location Services -> System Services -> Frequent Locations. Additionally, you may want to visit Settings -> Privacy -> Location Services to turn off location-based alerts, ads, or the time zone.
  • Close Out of Apps and Check for Software Glitches – To clear apps from application memory, double-tap on the home button and swipe upward and offscreen the apps that you do not want active. You can also check for a software glitch that may have crashed apps in the background by visiting Settings -> Privacy -> Diagnostics & Usage -> Diagnostic & Usage Data.

How much does iPhone 4 battery replacement cost?

Your iPhone 4 may have a battery issue that requires battery replacement rather than a change of habits or software fixes. iPhone 4 battery repair is available through several professional service centers, each with a different cost and timeline.

Apple Store:

The Apple warranty covers a dysfunctional battery at no cost. But if your device is out of warranty, Apple offers battery replacement service for iPhone 4 for a standard $79 plus shipping. The repair may take up to three weeks.

Batteries+Bulbs:

Batteries+Bulbs now also replaces iPhone screens and batteries. The price may vary but is quoted at $59.99 for replacing iPhone 4 battery. The repair happens in-store on a first come, first serve basis.

CPR Cell Phone Repair:

With more than 100 stores across North America and a simple mail-in repair option, CPR is a convenient choice for any iPhone 4 repair. Other benefits of choosing CPR include affordability, a typical 24-hour turnaround, and a minimum limited lifetime warranty on all parts and labor.

A DIY Guide to iPhone 4 Battery Replacement

You might initially think that you’d be better off trying DIY iPhone 4 repairs because of the lower cost. However, while you will only need to purchase the correct parts, there’s a higher probability of improper repair or further breaking your device. Once you open your iPhone 4, all prior warranties are rendered void. So if you do end up damaging your device, you’ll be paying more in the long run to repair more parts.

If you choose to DIY iPhone 4 battery repair, take these steps:

  1. Power off your device.
  2. Remove the two pentalobe screws near the Lightning connector.
  3. Slide the rear panel toward the top edge of the phone. It will shift 2 mm or so.
  4. Gently pull the rear panel away from the rest of the device, careful not to break the casing clips that were holding it in place.
  5. Locate the silver iPhone battery connector panel toward the bottom left of the battery. Unscrew the two screws attaching it to the logic board (and pay attention to where each individual screw goes).
  6. Use a plastic opening tool to gently pry up the battery connector. Start from the bottom edge and be sure that the connector is removed vertically. Attempting to force it sideways could break it.
  7. Use the plastic opening tool to detach the pressure contact beneath the battery connector panel. (Avoid touching the pressure contact, as the oils from your fingers can create wireless interference. Also avoid pulling up the battery connector socket.)
  8. Insert the plastic tool beneath the bottom right side of the battery and gently pry up, working your way up the length of the battery until it is free from the adhesive.
  9. Pull slowly and smoothly on the clear plastic pull tab until your battery detaches and comes free. If it does not come free, you can use the plastic opening tool. However, using the plastic tool in the wrong place may permanently damage the logic board.
  10. Replace the old battery with a new battery, and follow steps in reverse order until the phone is back together.

Remember, it’s not always clear which components need repair in the first place. An expert technician, like those at CPR, offer a free diagnosis and estimate so that you know exactly what is wrong and how much you will need to invest to fix it. They also understand how to replace an iPhone 4 battery connector and other related pieces if necessary. Find a Cell Phone Repair store near you and stop by today!

articla image

iPhone 4 Home Button Replacement

Do you need iPhone 4 home button replacement? This question has haunted you all day, ever since…

You were listening to music, browsing online, and chilling in the local coffee shop when suddenly that cute hipster guy sauntered over and struck up a conversation. Things went well, and he offered you his digits, so you pressed the home button on your trusty iPhone 4. Nothing happened. You wrote down hipster guy’s phone number the old fashioned way, all the while wondering why your iPhone let you down.

Even if this particular story doesn’t fit your case, a broken iPhone 4 home button can jeopardize parts of your social life, limit the capabilities of your expensive iPhone, and just be an outright aggravation.

Why is your iPhone 4 home button not working?

You might think that iPhone 4 home button breaks down due to one problem, but that’s not the case. While the most common reason is dust or dirt buildup, malfunctions may also occur after water damage or due to aging. The more often a part is used, the more it becomes worn. Dust, dirt, water, and other outside influences simply speed up that deterioration or interfere with internal components, leading you to start looking for iPhone 4 home button replacement parts.

A few things you can try to fix the problem:

  • Press down the home button and blow around the crevice. You may also use an air compression can. Also, try blowing air into the charger port. Air flow should help dislodge any dirt/dust.
  • Clean around the home button and charging port with a dampened cloth. Be very careful if you do this, as any liquid that makes it inside your phone can damage it further!
  • Hold down the power button while your phone is plugged in to charge. Wait until the “slide to power off” screen appears, release the button, then press it down again while sliding your finger across the screen. Reboot.

Available iPhone 4 Home Button Replacement Services

If these simple troubleshooting methods above didn’t correct the problem, the home button may be misaligned with the sensor below or, more likely, the flex cable beneath is probably worn down. Consider iPhone 4 home button repair from one of these service options listed below.

Official Apple Store

iPhone home button is not serviced at the Genius Bar and will cost $149, not for replacing the iPhone 4 home button but rather for replacing the entire device. It is not covered under Apple one-year warranty, as it is typically considered wear/damage through use.

CPR Cell Phone Repair

If your iPhone 4 home button seems to be getting rather cranky, give it to CPR! Cell Phone Repair technicians offer experienced iPhone 4 repair and replacement services at an affordable cost. With typical same day turnaround and a limited lifetime warranty, you’ll have your iPhone 4 back in your pocket working like new and a peace of mind to go along with it!

How to Replace iPhone 4 Home Button (A DIY Guide)

iPhone 4 home button repair cost is cheaper when it comes to doing it yourself. After all, you don’t have to pay for your own labor. You simply need time, patience, and the replacement parts. Of course, this method is the riskiest option and requires disassembling your iPhone almost completely. Any warranty will be rendered void, and there’s a chance you could do more damage if you don’t know what you are doing.

iPhone 4 Verizon Home Button Replacement vs. Others

Replacing the iPhone 4 Verizon home button arises from the same issue as other iPhone 4 models including AT&T and Sprint. All of these phones wear down over time and end up needing home button flex cable replacement.

However, the instructions to DIY vary for each model. Here is a step-by-step guide for iPhone 4 Verizon home button replacement:

  1. Power off your device.
  2. Remove the two pentalobe screws near the Lightning connector.
  3. Slide the rear panel toward the top edge of the phone. It will shift 2 mm or so.
  4. Gently pull the rear panel away from rest of the device. Set it and the two screws aside.
  5. Locate the silver iPhone 4s battery clip toward the bottom left of the battery. Unscrew the two screws attaching it to the logic board (and pay attention to where each individual screw goes).
  6. Use a plastic opening tool to gently pry up the iPhone 4s battery clip. Start from the bottom edge and be sure that it is removed vertically. Attempting to force it sideways could break it.
  7. Insert the plastic tool beneath the bottom right side of the battery and gently pry up, working your way up the length of the battery until it is free from the adhesive.
  8. Pull slowly and smoothly on the clear plastic pull tab until your battery detaches and comes free. If it does not come free, you can use the plastic opening tool on the left side. But be warned that doing so in the wrong place may permanently damage the logic board.
  9. Locate the grounding clip over the antenna (beneath where you just disconnected the battery clip). Unscrew the single screw holding the grounding clip in place, and set the screw and ground clip aside.
  10. Locate the dock connector shield to the left that is being held in place by two screws. Remove the two screws, setting them and the shield aside.
  11. The dock connector cable will be revealed. Gently peel the cable free, but be careful as it is being held on by adhesive.
  12. Beneath the grounding clip, a circular cable was also revealed. Unclip this cable, the antenna cable, from the logic board. Gently pry it up with a plastic prying tool.
  13. The cable will be wound around some metal brackets. Unwind it until it is simply connected by the speaker assembly. At this point, leave it where it is.
  14. Locate the logic board shield (sideways L at the top of the phone). Unscrew the 5 screws holding it in place plus the 6th screw off to the right of the logic board shield (on the wifi antenna grounding clip).
  15. There’s a clip holding the shield in place. Lift by the top edge and gently push down to disengage it and set the shield and screws aside.
  16. Return to the 6th screw and remove it from the wifi antenna grounding clip. Detach the clip beneath it with a pry tool. Note the screw underneath.
  17. Seven cables have been revealed in the removal of the logic board shield and grounding clip. Pop these up by gently lifting with the plastic pry tool.
  18. Lift away the camera.
  19. Unscrew the five screws holding the logic board in place. The one nearest the camera will have a gold grounding clip for the camera under it, so be careful not to lose that part.
  20. Remove the logic board by lifting from the bottom to the top. There is a rubber piece on the top that needs to stay in place for reassembly or your phone could experience wifi and reception issues.
  21. Locate the speaker assembly (at the bottom of the phone). Unscrew the two screws on either side of the assembly. There will be a triangular plastic spacer beneath the one to the left that allows the assembly to sit correctly. Place the spacer, the screws, and the assembly off to the side.
  22. Locate the vibrator assembly (just above where you removed the speaker assembly). Use the plastic pry tool to gently lift it from the device, as it is only held down by adhesive.
  23. Remove the four screws in the four corners of the device. The top left screw may have black tape over it. If so, just peel it off.
  24. There are 6 remaining screws which hold the LCD digitizer in place on the right and left sides of the device. Each of these has a washer and is difficult to get back in once removed. Instead, simply loosen them by 2-3 turns.
  25. To remove the LCD digitizer, you will need to pry the front panel away from the frame using a thin plastic tool. Start at one corner and work your way around, freeing it from the adhesive. Be sure to allow the LCD and digitizer cables to slip through the gap in the frame.
  26. Finally – the home button! Gently pop the clip open that holds the home button flex cable into the dock connector.
  27. Back the flex cable out of its slot, and remove by pulling it through the front of the phone.
  28. Remove the button from the old cable and place it on the new one or insert an entirely new button and flex cable combination into the phone.
  29. Reassemble the phone by following the steps in reverse.

As you can see, the DIY iPhone 4 home button replacement is complex and requires breaking down the entire device and its many tiny, delicate pieces. To perform the disassembly and assembly without any kinks requires a steady hand and experience, so don’t try it if you are not familiar or don’t feel comfortable with these steps. Instead, try one of the repair services outlined above like CPR.

articla image

The Limited Lifetime Warranty

Issues Warranty

In addition to being able to repair nearly any small electronic gadget that comes through our doors, and being able to complete most repairs in less than two hours, we also guarantee the quality of our workmanship and the quality of our parts for a full 6 months!

What does it mean for you?

If, at any time during our limited lifetime warranty period, the original repair fails because of the quality of the part we installed or the workmanship in repairing the device, we will fix it for FREE. No questions asked. Can’t beat a guarantee like that!

All CPR Stores are independently owned and operated. As such, not all stores may offer the same warranty.