Common Issues
MacBook Pro
The MacBook Pro is a well-loved computer, and for a good reason. Apple fans find them reliable workhorses, and they’re built to last. Whether you use your laptop for work, school, or play, hard drive failure can be catastrophic. If you’re looking to give your old MacBook Pro a new life or your current hard drive has already failed, CPR is here to help. Follow our easy-to-use instruction guide to perform a MacBook Pro hard drive replacement!
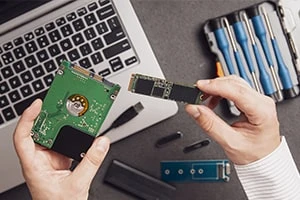
Before you get started, it’s essential to understand the differences in Apple’s hard drives over the years. Older MacBook Pro models have a traditional hard drive, also known as an HDD. They use physical force to write and preserve your data and, as a result, have to utilize moving parts. This can be a problem because eventually, those moving pieces tend to fail.
If you have one of these old hard drives, it can be useful to update it to a solid state drive (SSD). Since this storage option doesn’t move, it’s typically more reliable and faster than the traditional HDD.
Depending on the age, model, and whether your MacBook Pro is a Unibody, it can be easy, hard, or downright impossible to replace your hard drive at home. While Apple products are notoriously known for being challenging to repair, hard drive replacements on old MacBook Pro’s are relatively straightforward. If you’re not sure that you have the technical skills to go the DIY route, consider reaching out to a professional instead.
If you’re noticing these issues, it could be a sign that hard drive failure is imminent:
If your MacBook Pro is operating more slowly than usual, then you may benefit from upgrading to a newer, faster drive as well.
The total cost of your repair will depend on the type of new hard drive you want and the type of MacBook Pro you have. New MacBooks from around 2016 or later don’t accept the same upgrades, so it’s best to seek professional assistance. You can go through an Apple Store, certified professional, or attempt the repair yourself. Depending on the labor involved and the capacity of the hard drive you plan to upgrade to, you can expect to pay anywhere from about $150-500.
If you have an older model and have decided to handle your replacement, be diligent in preparation. Ensure that your MacBook Pro model is compatible with the drive that you’ve chosen. You’ll need the following parts and tools to complete your repair on an older MacBook Pro:
Connect your new hard drive to your computer and launch Disk Utility. To prepare the drive, you’ll need to select Erase to format it in preparation for your data transfer. You’ll be prompted to choose a format. We recommend selecting “Mac OS Extended (Journaled)” for older MacBooks.
Next, install macOS. You’ll be prompted whether or not you want to move over data from a Time Machine backup. If you don’t use Time Machine, you can also clone your old hard drive to your new drive using another program. This process can take a few hours, so if you’re in a rush, you can also migrate your data and reinstall applications from another external hard drive after completing your replacement.
Now, you’re ready to get started replacing your hard drive. Turn off your MacBook Pro, unplug it, and flip it over to remove the bottom case. There are ten screws total that you’ll need to remove. Note that there can be different types and lengths of screws used, so keep track of which one goes where.
Slide your fingers between the lower case and the black seam of your laptop, and gently remove it. Depending on your MacBook model, you may need to pop off clips that hold the lower case onto the upper case.
While it’s not completely necessary to remove the battery to replace your hard drive, it is highly recommended. Doing so ensures that you won’t accidentally short your device and damage your logic board. Your model of MacBook Pro may use screws to secure the battery to the upper case. Use a spudger to pry the battery connector out of its socket and away from the logic board.
Locate the two Phillips screws that hold your hard drive into the upper case on the hard drive bracket. Loosen them until you can lift the black bracket away from the drive. Next, pull on the plastic tab of your hard drive to pull it out of place.
Be mindful of the SATA ribbon, which connects to the bracket. Gently remove it straight out from the hard drive, leaving the bracket attached to your upper case.
Remove the four screws from the sides of your old hard drive. Depending on the drive, these may be Phillips or Torx screws. If you’d like, you can remove the plastic tab from your existing drive and apply it to your new SSD or hard drive.
To complete your replacement, follow these steps in reverse order. Start by transferring these old screws to your new drive.
Once you reboot your computer, you can expect programs to work faster than with your old drive.
To guarantee that your MacBook Pro hard drive replacement is done right the first time, consider reaching out to the experts at CPR Cell Phone Repair. Our professionally trained technicians are well-versed in common MacBook repairs, so you can rest assured that you won’t have to wait weeks for your hard drive or SSD upgrade. Plus, we offer free estimates and limited lifetime warranties on all of our repairs. Find a store near you to get started. Our friendly technicians will have your MacBook Pro running like new!
So much of our lives are tied to our electronics these days. With a device like the MacBook Pro, there’s no doubt that you rely on it. If your logic board isn’t working, it will stop you (and whatever you use your MacBook for) in your tracks. Read on to learn how to perform a MacBook Pro logic board replacement.
The logic board is Apple’s term for the motherboard. Replacing a logic board is usually a final effort since it essentially is the computer. Depending on what model you have, it can house everything from the CPU, graphics chip, RAM, and SSD. Because of its vitality, it’s often the most expensive part of the computer.
Since it controls so many different aspects of the computer, the signs that it’s going bad can overlap with other issues. Most often, logic board problems result in your MacBook Pro booting to a grey screen. Still, the following can also indicate a logic board issue:
If your MacBook Pro isn’t turning on at all, it could be either a battery issue or a fault on the logic board. If it fails to boot up even when your lower cord is plugged in, it points to a logic board issue.
Issues with the graphics chip portion of your logic board can show up in a variety of ways. Your display may not boot up at all, behave inconsistently, scramble images, or only show a faint image. Try plugging in your MacBook Pro to an external display to determine if it’s an issue with your screen or the motherboard itself.
You may also notice that your MacBook Pro isn’t recognizing devices that you’ve plugged in or run into problems accessing WiFi, your integrated webcam, and other peripherals. You may have realized that your fan has stopped turning on, leaving your computer to overheat. Another sign can lie in strange noises or frequent error messages. Both of which can signal another hardware issue or a logic board problem.
Several things can cause your MacBook Pro’s logic board to break. Manufacturing faults, liquid damage, and weakened solder can all create logic board problems. The more graphics power that your laptop has, the more heat it generates. Whether you have a MacBook Pro Retina or a MacBook Pro 15, the constricted space within the device and souped-up graphics can lead to part degeneration over time.
Sometimes! Often, specific chips and components are at fault and can be replaced without damaging the other chips on the logic board. Apple will typically take a no-risk approach and replace the entire board. It requires electronic knowledge, experience, and micro-soldering skills to repair individual components, so we don’t recommend trying to handle your logic board repair at home.
To avoid turning your MacBook Pro into a costly paperweight, we recommend going through a qualified service provider for your logic board replacement. The turnaround time on this type of repair can vary, so be sure to discuss what to expect with your technician when you drop it off.
If your MacBook Pro is relatively new, then your logic board repair service may still be covered by Apple. A new MacBook Pro comes with 90 days of technical support and a one-year limited warranty on hardware repairs. Plus, if you opted for AppleCare+ on your Mac, your coverage is extended for two additional years. If your MacBook Pro is still covered, you can expect to pay $299 plus tax for your repair. However, logic board replacements on MacBooks that are no longer under warranty can carry a substantial fee. Since so many essential components are housed in this part of your computer, the cost can be anywhere from $500-1,100.
If you decide to complete the repair yourself, you can purchase all of the tools and parts you’ll need online. Depending on the model of your MacBook Pro, you can expect the replacement logic board to cost anywhere from $150-500. In addition, you’ll need thermal compound and specialty screwdrivers on hand.
At CPR Cell Phone Repair, we always use professional tools and high-quality parts for MacBook repairs. The total repair costs for your MacBook logic board can vary depending on the model, extensiveness of the damage, and whether the motherboard can be repaired or must be replaced. We offer free estimate requests so that you don’t find yourself stuck with a surprising bill. Plus, all of our repairs are completed by certified technicians and backed by our limited lifetime warranty.
MacBook Pro logic board replacements are a complicated process and should only be attempted by those with experience with computer repair. These step-by-step instructions will walk you through how to replace the logic board on a MacBook Pro.
Before you get started, ensure you have the following tools and parts:
You will also need a new logic board for your laptop. You’ll need the complete model name of your MacBook, including the year and size, to determine the correct logic board model.
Once you have your supplies gathered, be sure that you have at least a couple of hours to complete your repair.
Logic board replacements on Apple products are complex. For expert repair services for your MacBook Pro, turn to the professionals at CPR. If you’d like to learn more about our MacBook Pro logic board replacements, contact a CPR Cell Phone Repair store near you!

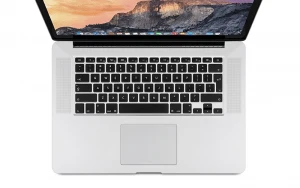
The MacBook Pro keyboard is easily one of the most used components of the device. That’s why when your keyboard malfunctions or breaks, it brings your productivity to a screeching halt.
As the Apple MacBook series has evolved, the company has sought to improve and enhance its pieces and parts. Apple adopted the so-called ‘butterfly switches’ in the newer versions of MacBook Pro laptops. The butterfly mechanism was designed to enable the MacBook Pro to be thinner than ever before while increasing the size of individual keys.
But many Mac users have been reporting strange issues with this newer keyboard technology, such as high-pitched sounds associated with certain keys. If you’ve found yourself a victim of a defective keyboard, read on for information about MacBook Pro keyboard replacement and repair options.
Depending on the keyboard issue you are experiencing, a repair may be possible rather than a complete MacBook Pro keyboard replacement. On some MacBooks, problems such as sticky keys can be repaired by removing the single key and cleaning underneath it. But if your keyboard’s troubles are more complicated, or you own a newer version, you’ll probably have to replace the entire thing.
Because of the custom designed keyboard on MacBook Pros—as well as the proprietary hold Apple imposes on most of its hardware—replacing it can prove to be challenging, not to mention costly.
Without the AppleCare+ extended warranty, the fee to replace your MacBook Pro’s keyboard at the official Apple store will be astronomical. Still under warranty or have AppleCare+? You’ll likely be charged about $125. But that does not include keyboards that have been damaged by water or other liquids. Those repairs from Apple will cost you anywhere from around $600-$1,300, depending on the size and state of your laptop.
If your MacBook Pro keyboard needs to be replaced, you do have the option of completing the replacement yourself. You can buy all the tools, as well as a new keyboard, online for around $40-$50. But, keep in mind that when attempting a DIY replacement, you run the risk of damaging your device further.
Choosing CPR Cell Phone Repair to perform a MacBook Pro keyboard replacement is a smart choice. Our team of techs are experts in their field and have years of experience servicing Apple products, such as MacBooks. Plus, at CPR we offer limited lifetime warranties on our repairs, free estimates on service costs and convenient, mail-in options. Find your local CPR Cell Phone Repair store here.
The keyboard is connected to the entire assembly, which means you will actually need to replace the entire assembly if need a MacBook Pro keyboard replacement. Use this DIY guide from CPR to do so.
Steps:
MacBook Pro keyboards are delicate devices making it easy for dust, dirt, crumbs, and other particles to cause problems with the mechanics of the instrument. When these molecules get in, they render the keys inoperable and need to be forced out. Use a can of compressed air to blast out the offending debris from under the keys.
If you have questions about your MacBook Pro keyboard or need assistance to repair or replace it, don’t hesitate to contact the nearest CPR Cell Phone Repair store.
With each model of Apple’s MacBook computer series that is released, components of the device change. And thus, so do the repair services. The same is true of other leading brands, which can be frustrating for consumers. But never fear – CPR Cell Phone Repair is here to help! In this article, we’ll discuss how to replace screens on MacBook Pro models.
Depending on the generation of MacBook Pro you own, the cost of replacing the screen could differ drastically. Research your MacBook Pro repair options to find the solution that best fits your budget.
If you encounter a cracked screen that needs to be replaced on your MacBook Pro, you may be inclined to head straight to the closest official Apple Store. And while the Apple experts obviously know what they are doing, be prepared to pay a pretty penny. If you purchased AppleCare+ for your MacBook Pro, then you are covered for “up to two incidents of accidental damage.” If your initial warranty expired and you failed to purchase AppleCare+, brace yourself for a hefty bill.
Think you’re adept enough to tackle a MacBook Pro screen replacement yourself? There are some DIY kits available for purchase from third-party providers. However, if you over-estimate your dexterousness, you could end up inflicting more damage on your device, costing you more in the long run.
But if you’re ready to give it a go, these MacBook Pro screen replacement kits can be found on Amazon, eBay, and other retailers and run from $300 – $700 depending on the seller. They should include all tools and parts necessary to complete the replacement.
At CPR Cell Phone Repair stores, the price for MacBook Pro screen replacements will vary slightly, depending on the size and generation of your device; however, most CPR locations are servicing MacBook Pro screen replacements for costs starting at $300. In addition to providing superior service and premium parts, our work is backed by a limited lifetime warranty, and we offer free, no-commitment estimates on repair costs.
Ready to try and tackle a MacBook Pro screen replacement yourself? Then clear off a workspace, gather your tools, and follow this step-by-step guide from the expert technicians at CPR.
Tools
Steps
There you have it! If you’ve followed these steps correctly, your new screen should be fastened in place.
Your best bet when it comes to MacBook Pro screen repairs is to avoid needing one at all. Protect your laptop from cracked screens, as well as dings, scrapes, and scratches, by purchasing a computer case and screen protector. Check out the inventory at the CPR store nearest you for a wide variety of products to protect your MacBook Pro.
MacBook Pro screen repairs should be handled by a certified professional, so don’t hesitate to contact your local CPR today! If there’s not a CPR Cell Phone Repair store near you, use our easy and convenient mail-in repair service!

Your MacBook Pro is an extension of your life that houses critical documents, pictures, music, and other entities that revolve around your life. When the “brain” or battery to your MacBook Pro diminishes, so does a small piece of yourself. To subside mental and physical hysteria when your laptop refuses to properly function, continue reading to know your way to MacBook Pro battery replacement.
When you imagine your MacBook Pro, you envision a sleek, ultra-efficient design cast from premium aluminum. When your MacBook Pro’s battery begins to resemble a pufferfish as it begins to expand or swell, it’s time to replace the battery or turn to the experts at CPR Cell Phone Repair for assistance.
Generally, when a MacBook Pro’s battery cells are overcharged, they react negatively. When the lithium-ion batteries are overcharged, the lithium builds up faster than it can deplete, thus losing its stability. As the lithium loses stability, the reaction produces a combination of heat and gasses inside of the battery. Once gasses are produced and with little ventilation, the battery casing expands and gives off the swollen appearance.
An expanding or swelling battery for your MacBook Pro may start out as the trackpad malfunctioning or a noticeable bulge in your laptop’s case. Overcharging the lithium battery is the leading cause of swelling and expanding. MacBook Pro battery malfunctions also attribute to manufacturing defects, battery life, or mistreatment such as using the incorrect power cord or not exercising the battery.
Even with battery manufacturers developing safeguards to withstand swelling and expansion, all technology can malfunction. If your battery is swelling or expanding, it’s time to replace the battery for your MacBook Pro immediately.
To prevent your MacBook Pro’s battery from swelling or expanding follow these tips: avoid overcharging, keep your device in a cool environment, replace the battery when it’s noticeably exhausted or not charging, and monitor your MacBook Pro’s battery life. To ensure your battery level is not overcharging, click on the Apple logo > about this mac > more info > system report > power.
Pro Tip: All Mac chargers cease charging by displaying an “orange” LED on the charging cable and “green” when the battery is topped off. Apple recommends you optimize your MacBook’s settings in terms of energy, brightness, Wi-Fi, applications and peripherals to help prolong the life of the battery.
If your MacBook Pro’s battery is swollen and expanding, you must exercise extreme caution as the gasses that have built up within are exceptionally toxic. It is imperative that you take the correct precautions when replacing the MacBook Pro battery to avoid injury to yourself and others. If the battery is difficult to remove, do not go any further as serious injury can occur. If you manage to remove the swollen battery, place it in a cool container to avoid the heat.
Once removed dispose at an authorized battery facility and not just in the trash. Many CPR Cell Phone Repair locations have the equipment and processes to safely handle batteries. Other locations include your nearest Apple Store, Best Buy, and Target. Overall it’s best to have a professional technician remove and replace the swollen or expanded battery.
To avoid possible injury, replace your MacBook Pro’s battery with a qualified vendor that provides the best quality parts, and elite technical knowledge. Typical turnaround time for a battery replacement varies by vendor, so be sure to ask your technician when scheduling a drop-off.
Apple provides a one-year limited warranty that covers the replacement costs for a defective battery. If you happened to purchase the AppleCare Protection Plan, additional replacement coverage for the battery is included. A complete replacement of the MacBook Pro Battery is included in the AppleCare Protection Plan at no additional charge if the battery retains less than 80 percent of its original capacity. Without the AppleCare Protection Plan, Apple charges a substantial fee. See the chart below for a complete breakdown to replace your MacBook Pro battery at an Apple location.
Another option to replace the battery for your MacBook Pro is to visit your nearest Best Buy location. Best Buy’s team of technicians, also known as Geek Squad, offers to replace your MacBook Pro battery for around $40.00 plus the cost of install. Expect a two-week turn around for all MacBook Pro battery repairs and to pay $120.00 to $150.00 when choosing Geek Squad.
At CPR Cell Phone Repair, all MacBook Pro parts come from preferred dealers that ensure high-quality parts and consistency across the network of over 300+ locations. Along with CPR delivering only the most elite parts, all battery repairs are also backed by a 6-month warranty. Sure, you can buy a MacBook Pro battery online but based on the diversity of quality on products found online, there’s no real way to be certain that you’re getting the highest quality product or a warranty like you would at a CPR Cell Phone Repair location. The experts at CPR Cellphone Repair can fix your MacBook Pro battery in about an hour for around $130.00 with labor included!
It is imperative to review all possible options prior to replacing the MacBook Pro battery yourself. If you choose to repair the battery yourself, you need to know what model MacBook you have prior to purchasing a new battery. To successfully identify what MacBook Pro model you have, click here.
After you locate your MacBook Pro’s identification number, you can then enter it into EveryMac.com’s, Ultimate Mac Lookup feature to identify all of your MacBook Pro’s specs. You can also identify MacBook Pro’s by their serial number, which happens to be located on the bottom of the laptop within the operating system near the hinge.
Once you’ve discovered the correct replacement battery for your MacBook Pro, follow the instructions below on how to safely replace the old with the new.
You’ll need the following tools to replace your MacBook Pro battery:
Step 1: The Lower Case
Step 2
Step 3: The Battery
Step 4
Step 5
Step 6
To ensure your Apple MacBook Pro battery is properly replaced the first time, you can rely on the expert repair services of CPR Cell Phone Repair. We keep parts from most common MacBook repairs in stock, so you’ll never wait weeks for your precious devices. We also offer a mail-in repair service for customers who can’t get to a local store.


In addition to being able to repair nearly any small electronic gadget that comes through our doors, and being able to complete most repairs in less than two hours, we also guarantee the quality of our workmanship and the quality of our parts for a full 6 months!
What does it mean for you?If, at any time during our limited lifetime warranty period, the original repair fails because of the quality of the part we installed or the workmanship in repairing the device, we will fix it for FREE. No questions asked. Can’t beat a guarantee like that!
All CPR Stores are independently owned and operated. As such, not all stores may offer the same warranty.