iPhone 6 Battery Replacement
The iPhone 6 is an elite smartphone that has revolutionized how we simplify our lives. From plugging in daily reminders to our own personal jukebox, the iPhone 6 is constantly working hard. Over time, all that hard work begins to take a toll on your iPhone 6’s battery capacity that can potentially lead to long-term battery life issues.
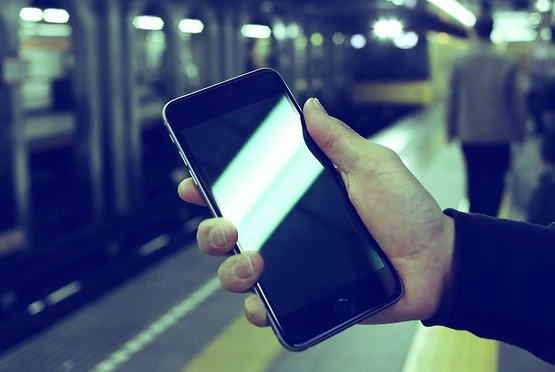
Is Your iPhone Battery Draining Too Fast?
There’re plenty of battery cases out there that will help boost the life of your iPhone, but those too will lose their battery capacity over time and require charging. You may be thinking to yourself, “how do I remove the battery from my iPhone 6?”. To avoid frantically looking for outlets to plug your phone into or running around with 5% battery, try these three simple tips to extend the battery life of your iPhone 6.
- Turn on Low Power Mode
- When only 20% of your battery remains, this new feature will enable you to gain three additional hours of battery life from your iPhone 6. Your iPhone will display a warning and provide the option to turn on Low Power Mode when it reaches 20% to save power consumption.
- Simply go to Settings > Battery > turn on Low Power Mode
- Utilizing Low Power Mode will: reduce power consumption, Hey Siri, automatic downloads, stopping Mail fetch, background app refresh, and some visual effects.
- Airplane Mode
- If you don’t require access to data, receiving or making calls, you can turn off the iPhone’s antenna. The iPhone antenna is one of the largest drains of battery life because it’s constantly checking for Wi-Fi and cellular networks.
- Simply swipe up on Control Center and tap the airplane logo, or tap Settings and set Airplane mode to On.
- If you still require data, you can use Wi-Fi when Airplane mode is enabled. With Airplane mode still on, simply swipe up on Control Center and tap the Wi-Fi icon next to it. When you’re in areas that have low coverage, enabling Airplane mode is suggested because your iPhone will search and cling onto a signal while quickly draining your battery.
- Screen Brightness
- Powering the pixels on your iPhone’s Retina display requires more energy than most of the apps combined. So it shouldn’t come as a surprise to hear that your screen is one of the iPhone’s largest power drains alongside the antenna.
- Simply swipe up in the Control Center, then use the slider to drag far left to turn the brightness down.
iPhone 6 Battery Replacement Cost
So you’ve tried all the tips above, and even a number of others to try and salvage your iPhone 6 battery life. Now you’re faced with comparing battery costs and where to purchase a new battery from, so consider the following:
Official Apple Store
Going to the Apple store may be your first call to action, but consider the out-of-warranty costs associated. If your AppleCare+ warranty has expired, expect to pay $79.00 for your iPhone 6 battery replacement.
Best Buy
Getting more than one quote is going to be your best bet, so what about Best Buy? According to Best Buy, if you have a plan that’s tied to Geek Squad, the price to replace your iPhone 6 battery will cost $150.00.
CPR Cell Phone Repair
By partnering with Cell Phone Repair, you’ll pay $65.00 for an iPhone 6 battery replacement, saving you time and money.
Using an iPhone 6 Battery Kit
If you’re looking to replace and remove the battery from iPhone 6 yourself, here are a number of industry leading iPhone 6 battery kits and what experts are recommending, and remember batteries are sold separately.
- iFixit: iPhone 6 Replacement Battery – Fix KitiPhone 6 Price: $39.95
- Expert Review: “The part about iFixit is their illustrated repair guides that rake you step by step through the process.” – The Dallas Morning News
- iCracked: Repair Tool Kit for iPhones
- Price: $8.95
- Expert Review: “The Gadgets, Life Hacks and Apps Tech Entrepreneurs Actually Use.” August 27, 2014 – Forbes.
How to Replace iPhone 6 Battery – DIY Guide
Consulting with your local Cell Phone Repair is highly recommended before performing any repairs yourself. If you already have your DIY kit in hand – here’s how to replace iPhone 6 battery instructions.
- Acquire the necessary DIY kit and parts to disassemble iPhone 6 battery.
- Completely power down your iPhone.
- Using a 3.6 mm Pentalobe screwdriver, remove the two screws located next to the Lightning connector, or where you commonly plug your phone into charge.
- Take your suction cup and place it directly above the Home button ensuring it’s tightly sealed.
- Slowly and gently pull up on the suction cup to separate the front panel assembly from the rear case.
- Next, use the plastic opening tool to slowly pry the rear case down and away from the display assembly, while slowly pulling up on the display. Since there are several clips holding the front panel assembly to the rear case, you’ll need to use the suction cup and plastic opening tool to free the front panel assembly.
- Remove the suction cup by squeezing the plastic nub that the metal ring goes through.
- Using the top of the phone as a hinge, gently pull the home button end from the front panel assembly away from the rear of the case. While doing so, make sure to keep the front panel supported at a 90˚ angle.
- There will be several clips located along the top edge of the front panel that forms a partial hinge. With ease, you should be able to swing open the front panel assembly.
- Inside you’ll see 5 Phillips screws that secure the front panel assembly cable brackets, but remove all five and keep them in the order in which they’ll be reassembled.
- One 3.1 mm screw
- One 1.7 mm screw
- Three 1.2 mm screws
- Remove the front panel assembly cable from the logic board slowly.
- For the following four steps, pry up only on the cable connectors and avoid doing so on their sockets located on the logic board.
- Disconnect the front-facing camera and sensor cable connector by using the flat end of a spudger tool.
- Next, disconnect the home button cable connector using the flat end of the spudger tool.
- Using the spudger, disconnect the display data cable connector.
- Disconnect the digitizer cable connector using the flat end of the spudger.
- Carefully remove the front panel assembly from the rear case.
- Battery Connector – remove the Phillips #00 screws from the battery connector bracket.
- One 3.2 mm screw
- One 2.2 mm screw
- Gently remove the metal battery connector bracket from the iPhone.
- Slowly pry the battery connector up from the socket on the logic board using the plastic opening tool.
- Battery – Carefully peel back the first battery adhesive tab from the bottom right edge of the battery.
- Pull the battery adhesive tab away from the battery and towards the bottom of the iPhone.
- As you continue to pull slowly, the strip will begin to slip out from between the battery and the rear case. If you feel resistance from the strip, stop pulling and continue with the following step.
- If you happen to feel resistance from the adhesive strip, gently pull it around towards the lower right corner of the battery.
- As you continue to pull the adhesive tab upward and away from the right edge of the battery, the tab will slowly slide out from between the battery and the rear case until it’s free from the iPhone.
- Next, peel back the second battery adhesive tab located at the bottom left edge of the battery.
- Again, slowly pull the battery adhesive tab upward and away from the battery, allowing the strip to slide out until you feel resistance.
- Once you feel increased resistance from the strip, gently pull it towards the lower left corner of the battery. If any of the strips broke off and the battery is stuck, prepare to use an iOpener to remove the battery.
- Flipping the phone back over and insert a plastic card between the side of the case and the battery. Do not pry against the logic board because that can result in further damages. Gently press the card in further to break up the adhesive lodged behind the battery.
- Remove the iPhone 6 battery.
- In order to reassemble your iPhone 6, follow these easy instructions in reverse order.
Sources:
Apple: iPhone Repair – Battery & Power
Forbes: How To Replace The iPhone 6’s Battery


MORE ON Microsoft Surface Pro 4
WHAT CUSTOMERS ARE SAYING
Lefonzo Pollock
Same day requests accepted. Droped my phone off at 1:30 and it was repaired within an hour. Note 10+ new screen, digitizer an frame. I highly recommend them! Friendly and fast, my phon÷ is like new. Thanks!
Ron Blake
fair ans helpful
Matthew White
It's a good place to get ur phone repaired